Your roof is more than just shelter from rain and sun; it’s your home’s frontline defense against all kinds of weather. It can even help you cut down on energy costs and give your house some curb appeal. Living in Pittsburgh, the weather can be challenging, with heated summers and harsh winters. So, investing in a quality roof is essential. This guide is designed to help you navigate the essential steps for installing a long-lasting roof. Stick with these tips, and you’ll be well on your way to having a durable and good-looking roof, ensuring your home stays safe and cozy for the long haul.
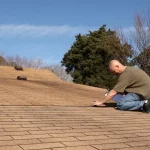
Step 1: Roof Inspection
Why Inspection is Essential
Before diving into the installation, knowing what you’re working with is crucial. An initial roof inspection serves as your roadmap, highlighting any existing issues that could impact the quality and longevity of your new roof.
What to Inspect
When inspecting your roof, focus on three main areas: structural integrity, signs of wear and tear, and water damage. Knowing the state of your roof’s structure can save time and money in a city where snow load and rainfall are significant factors.
Hiring Professionals
While it might be tempting to perform the inspection yourself, the expertise of a certified inspector is invaluable. Living in Pittsburgh simplifies the process, as you can easily find qualified Pittsburgh roofers. Professional Pittsburgh roofers are trained to spot issues that most of us would overlook. They can provide a detailed assessment and recommendations, helping you make well-informed decisions for the upcoming installation process. Choosing an inspector should involve the following:
- Researching.
- Looking for credentials and reviews.
- Asking for recommendations to ensure you get the best expertise for your project.
Step 2: Preparation of the Roof Deck
The Roof Deck Explained
The roof deck is essentially the base layer over which all other roofing materials will be installed. Think of it as the foundation of your roof. Its primary job is to provide a firm, even surface for the underlayment and final roofing material, ensuring your roof is stable and durable.
Cleaning and Repairs
Before any new materials go up, the roof deck needs to be clean and in good shape. Remove any debris like leaves, twigs, or old roofing material. If there are damaged sections, repair or replace them now.
Safety Measures
Safety should never be compromised. Always use proper safety gear, including harnesses and non-slip boots. Make sure ladders are secure and tools are in good condition. Following these preventive methods helps minimize risks and ensures a smoother installation process.
Step 3: Installation of the Roofing Underlayment
The Role of Underlayment
Underlayment is a protective layer between the roof deck and the roofing material. It provides water resistance, helping to keep moisture away from the deck. In addition, it offers an extra layer of insulation, which can be beneficial for temperature control inside the building.
Types of Underlayment
There are mainly two types of underlayment: synthetic and felt. Synthetic underlayments are generally more durable and water-resistant, whereas felt is often less expensive but may not offer the same level of protection. Choose the type that best suits your specific needs and local climate conditions.
Installation Process
Installing the underlayment is a straightforward task but needs to be done carefully. Start by laying the material flat against the roof deck, ensuring no wrinkles. Fasten it securely using roofing nails or staples. When laying additional sheets, overlap the edges to create a continuous barrier. This overlapping is vital for preventing water intrusion and ensuring a long-lasting installation.
Step 4: Installation of the Roofing Material
Material Options
You have various options regarding roofing material, like shingles, metal, and tiles. Shingles are common and cost-effective, metal is durable and energy-efficient, and tiles offer a distinct look but can be more expensive. Your choice will depend on your budget, aesthetic preferences, and climate considerations.
Installation Techniques
You must decide on a starting point and a pattern for laying the material for a successful installation. For shingles, starting from the bottom corner is standard; panels are often installed from one side to the other for metal roofs. Whatever material you choose, ensure it is securely fastened to the underlayment and roof deck to prevent future issues.
Expert Tips
Here are some quick tips for a smoother installation:
- Follow manufacturer guidelines for the material you’ve chosen.
- Pay close attention to corners and edges; they are common spots for leaks.
- Avoid over-driving nails or screws, as this can cause the material to dimple or warp.
Step 5: Final Inspection
What to Check
Once the installation is complete, it’s time for a final inspection. Focus on the seals and fasteners to ensure they are secure and in place. Also, take a look at the overall artistry. Are the materials laid evenly? Are there any visible issues? A thorough final inspection is the last line of defense against potential problems.
Documentation
After confirming that everything is up to par, collect all necessary documentation. It includes the warranty for the roofing material and a certificate of completion from the contractor. Keep these documents safe; you’ll need them should any issues arise.
Maintenance Tips
Your responsibility doesn’t end with installation. Regular checks and maintenance can extend the lifespan of your new roof. Keep an eye out for debris and clear it as needed. Inspect seals and fasteners at least once a year to ensure they are still tight. Long-term care is just as important as the installation for maintaining your roof’s integrity.
Conclusion
You’ve just walked through the five essential steps of roof installation, each one building on the last to ensure a durable, long-lasting roof. Starting with an inspection lays the groundwork, allowing you to identify and tackle any issues upfront. Preparing the roof deck sets a solid foundation, followed by the underlayment as a protective barrier. Choosing and installing the right material will significantly influence your roof’s lifespan.
While these steps offer a comprehensive view, remember that a roofing project involves nuanced details best handled by professionals. So, for a well-installed roof that stands the test of time, don’t hesitate to consult experts in the field.